
Making Mouse Bait Stations
May 27, 2019
Opalyn:

A finished bait station placed outside Finney. Can you spot it to the left of the steps?
May 16: Nora, Kiri, and I headed out to Finney, a single-wide mobile home with a bump out, for some spring cleaning. We focused our efforts on the kitchen and living room and found plenty of mice sign. We also discovered that they were visiting the bedding that was being stored in one of the bedrooms. Concerned with human health (feces and urine) and risk to cats and dogs from using pet accessible bait, I did some research and found what I’ve started calling the Cinder Station.
I spent some time on YouTube and found several inspiring options to keep the mouse population in check and settled on the cinder block mouse bait station that hides in plain sight. A trip to Home Depot and a visit to AmazonSmile (for a donation to Windward) completed the shopping list.
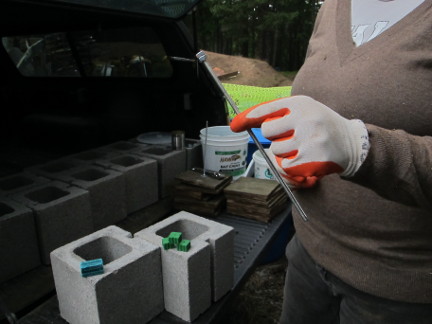
May 21: Shopping List
- Cinder blocks – the single blocks that are roughly 8x8x8″
- A sheet of “green” treated plywood ~1/2″ thick
- All-thread rod – 1/4″ x 20 x 12″ long
- Fender washers 1/4″ zinc (box of 100)
- Hex Nuts 1/4″(box of 100)
- Wing Nuts 1/4″ (packages of 4)
- two or three different types of bait
The first slice

Several more passes and I have a stack of 7.8″ x 4′ strips
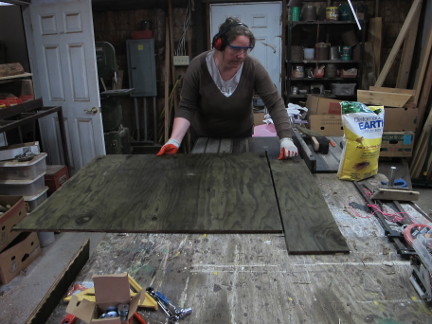
The helpful folks at the lumber store were kind enough to cut the plywood down so it would fit in my car. That made it easier and safer to manage on the table saw. Just make sure that you’re careful to specify the right dimension when you ask for help.
I asked for three pieces (two cuts) 36″ resulting in two pieces that are 36″ x 48″ and one that is 24″ x 48″.
When I got home, I ripped the plywood to 7.8″ strips. Because 8″ does not divide 36″ evenly I ended up with lots of 7.8″ strips and two strips that were about 5″ wide.
Live and Learn. 🙂
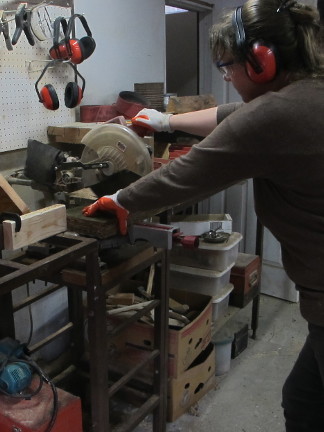
Over to the chop saw and now I’ve got squares
Then I took the strips over to the chop saw and cut them down into squares.
Setting up a STOP (see the 2×4 clamped on the left side of photo) makes cutting lots of pieces the same size easy.
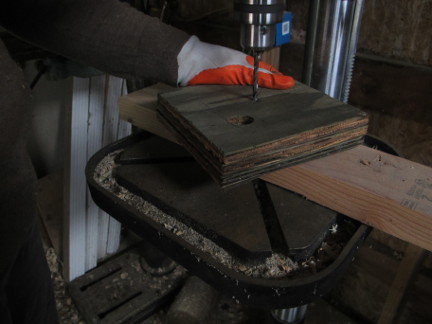
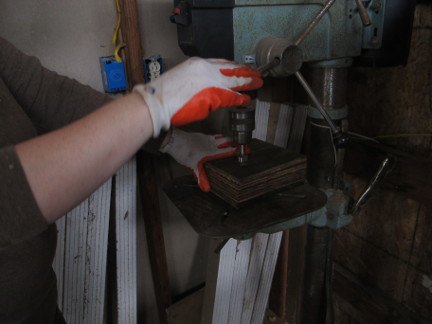
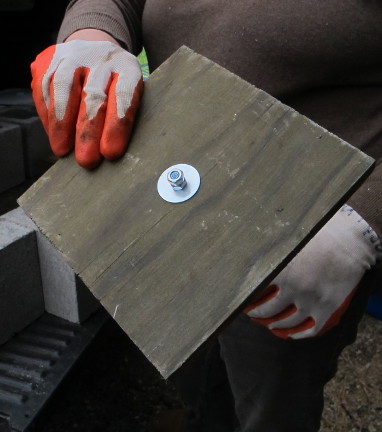
Drill a 1/4″ hole in the center of the plywood
Next, mark up a piece of plywood by placing a cinder block on top and marking the inside of the cinder. I also marked an X on the cinder to denote the center of the square for drilling the hole for the all thread.
Keep drilling until every piece has a center hole.
With a spade or forstner bit, drill a mouse hole in half of the plywood squares
Using the marked up square, I was able to decide where to place the larger mouse hole so that it was just inside the cinder and not blocked by the cement at all.

Two of the baits being used
The YouTube videos recommended using three different baits and I decided to purchase:
- Motomco Hawk bait chunks with Bromadiolone, an anticoagulant
- Top Gun containing a neurological bait
- d-Con containing vitamin D3 which is safe for humans but poisonous to rodents.
All three baits are mixed with food stuffs that the mice want to eat and they die within hours so they return to the forest and I do not have to clean up dead mice.
Assembly of the Cinder Station
All-thread with bait on cinders in left corner
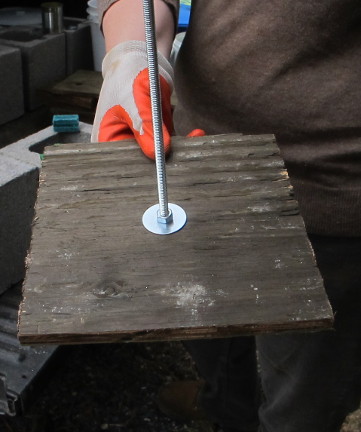
Put a nut on about 2″ from one end. Then a fender washer, one piece of plywood (without the mouse hole), another fender washer, then two nuts. Lock the two nuts together close to the end of the all thread, then tighten the nut on other side of the plywood for a secure hold on the sealed end of the station.
The bottom/back of the cinder station
The inside (other side) of the back piece
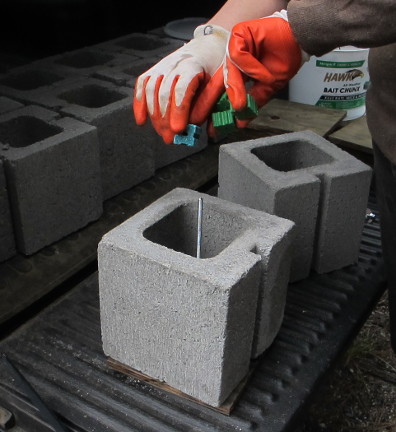
Time to add the bait
Place the plywood cap on a raised surface, like another cinder block or the tail gate of a truck. Then, position a cinder block on the plywood cap and add bait.

Next up – secure the front of the unit
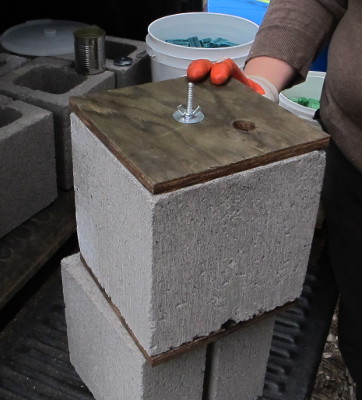
Place the top/front (with the mouse hole)on the cinder block, then add a Fender washer and wing nut.

Tighten the wing nut
Wiggle/straighten the unit and tighten the wing nut.
Ready to deploy – turn it on its side so the mice can find the bait
Final Analysis
The cost of one Cinder Station is just under $4.00. The cost of a bait refill is about $1.90 when using three baits and purchasing online. The sheet of treated plywood was the single most expensive item on the shopping list, so if you only wanted to make a few stations, your per station price would be higher.
The only maintenance is to clean out and refill the baits once or twice a year.