February 26, 2013
Opalyn:
Since diving into fiber arts just about a year ago, I have been exploring what it takes to turn the wool our sheep produce into something lovely to wear. I have washed, teased, picked, carded, and even combed some of the wool from last spring. I even had a brief excursion into dyeing and just the other day a little boy told me that I have blue sheep. Last summer I worked with a rigid heddle loom and this winter I've been exploting all things weaving. I experimented briefly with a frame loom and recall weaving on a loopy loom, making colorful potholders around the time I was in sixth grade.
Loopy Looms are great for potholders and small items but what if you want to make a blanket or fabric for a wool coat? Then you need a table loom or a floor loom and you need to learn a new language too. Windward has a floor loom #8210 a counter-balance loom #8210 which needs a bunch of cleaning and some repairs. My mom didn't know about Windward's loom and wanted to help make this dream a reality. We lucked out and found a loom on craigslist that came with all the accessories and tools needed to get started. It is a large counter-balance (floor) loom with a three-foot weaving width. Along with all boat shuttles, stick shuttles, lease sticks, it also came with a 24" table loom with four harnesses and a 12 dent reed. See, I told you it required learning a new language - I'll explain more as we go along.
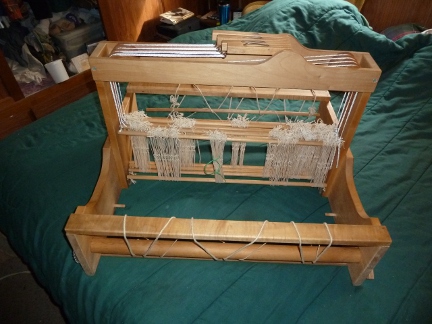 My new four harness table loom
Given the Christmas weather, my new counter-balance loom has to stay at my parents house for now but I was able to bring home my new table loom. It needs a tune-up and I need some lessons. Although I live in a rural area, I decided to spend a few days in Portland learning from the women at Ruthie's Weaving Studio. If you have the opportunity, I highly recommend getting involved with a weaving studio or guild such as Handweavers Guild of America.
I scheduled a seat at the "studio" loom and had two days to make a kitchen towel. I sat down at a counterbalance floor loom and started throwing a shuttle. With a little instruction and several pointers, I was quickly making progress on my towel.
 My new kitchen towel
I continued making progress and had a few treadling (pattern) errors to work out. Read: undo several rows to discover where things went wrong and then continue on. As I changed colors I marked notes on a paper tape measure so that when I got to the half way point and turned the tape measure around, I could repeat what had been done (in reverse) so that the towel would be symmetrical.
 The color changes line up :)
With a bit more instruction and help, we cut my towel off the loom and I was given finishing instructions (ie. hemming and washing).
 The raw edges at the bottom of this photo need hemming.
The staff at the studio were very helpful and gave me some pointers on how to clean my loom as well. I headed to the market for some Murphy Oil Soap to use to wash the wood and instructions on how to tie the string heddles together so that they could be washed and put back on the harnesses with minimal hassle.
 Murphy Oil Soap
Each of the four harnesses has 100 string heddles on it and removing them individually then washing them would create a string mess when it came time to put the heddles back on the harnesses. Using a "suit-case handle" knot to secure the tops and the bottoms of each group of heddles makes it relatively easy to put them back on the harnesses.
 Tie the string heddles together at the top and bottom
With a clean loom ready for a project, I was ready to head back to Rutie's Weaving Studio to learn the more about project planning and preparing the loom.
So what does it take to make cloth? Quite a bit of patience and persistence to go with your loom and cotton or wool.